A clean way to post to social media from n8n
A step-by-step walkthrough of building a complete content-to-publish pipeline in n8n using Postproxy.
One workflow, one API key, multiple platforms
We recorded a short tutorial showing how to publish to social networks from n8n using Postproxy. This post walks through the same flow in text form, for those who prefer reading to watching.
The setup is intentionally simple: a webhook trigger, an Airtable content plan, AI-generated text and image, and a single Postproxy node that handles publishing. No platform-specific branches. No manual uploads. No copy-pasting into social media UIs like it’s 2014.
You can watch the full tutorial here:
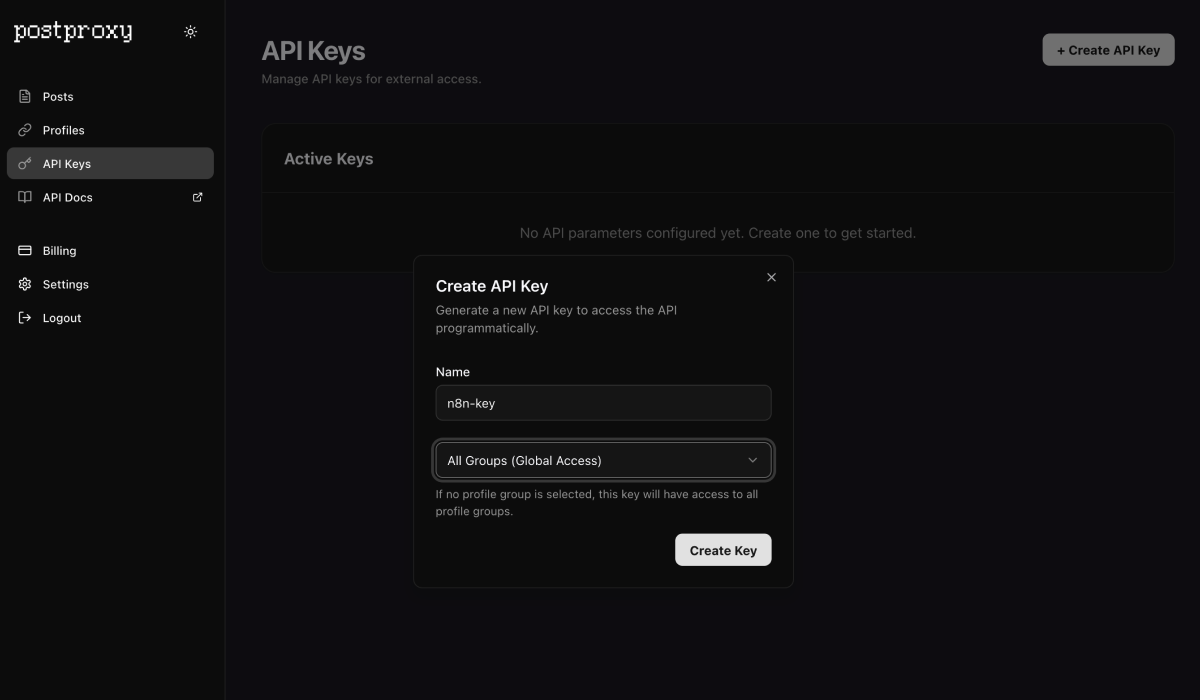
Start with the API key
In the Postproxy dashboard, go to settings and create a new API key.
This key is boring, and that’s the point. It doesn’t care about platforms, formats, or sudden API mood swings. It’s your publishing contract. One key covers every platform you connect.
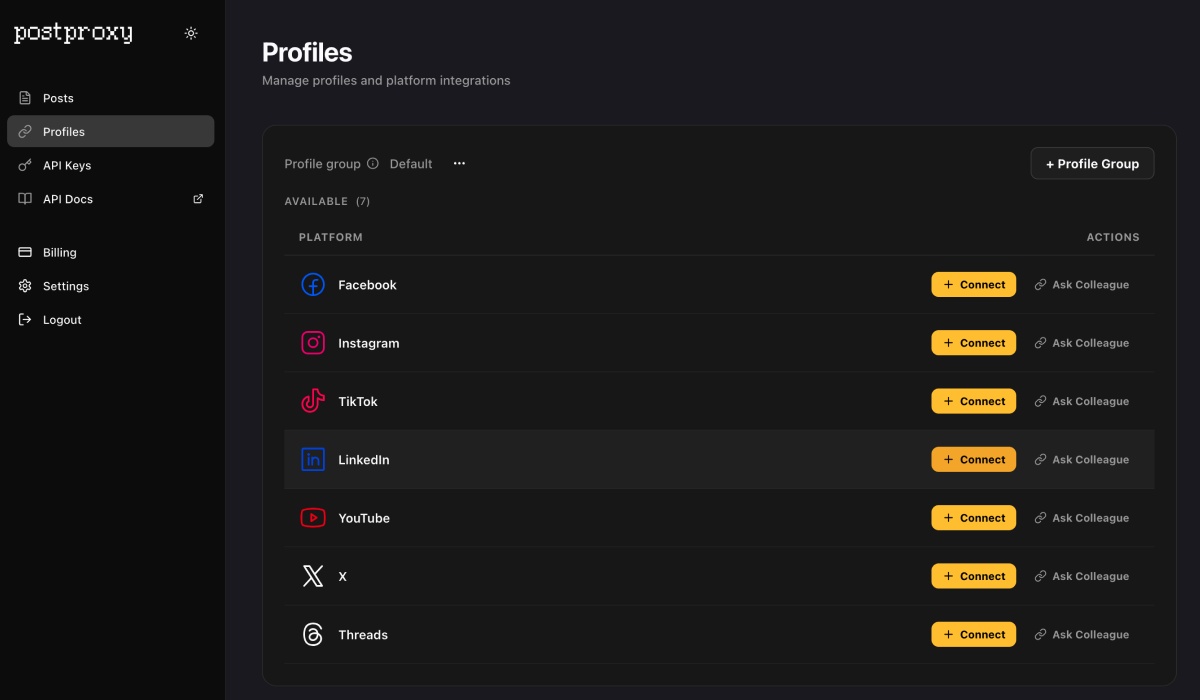
Connect social accounts
Next, connect the social accounts you want to publish to. LinkedIn, Twitter, Instagram — whatever you need.
This is typically the part where OAuth popups, scope mismatches, and vague error messages take years off your life. Postproxy handles the platform-specific chaos so your workflow doesn’t have to.
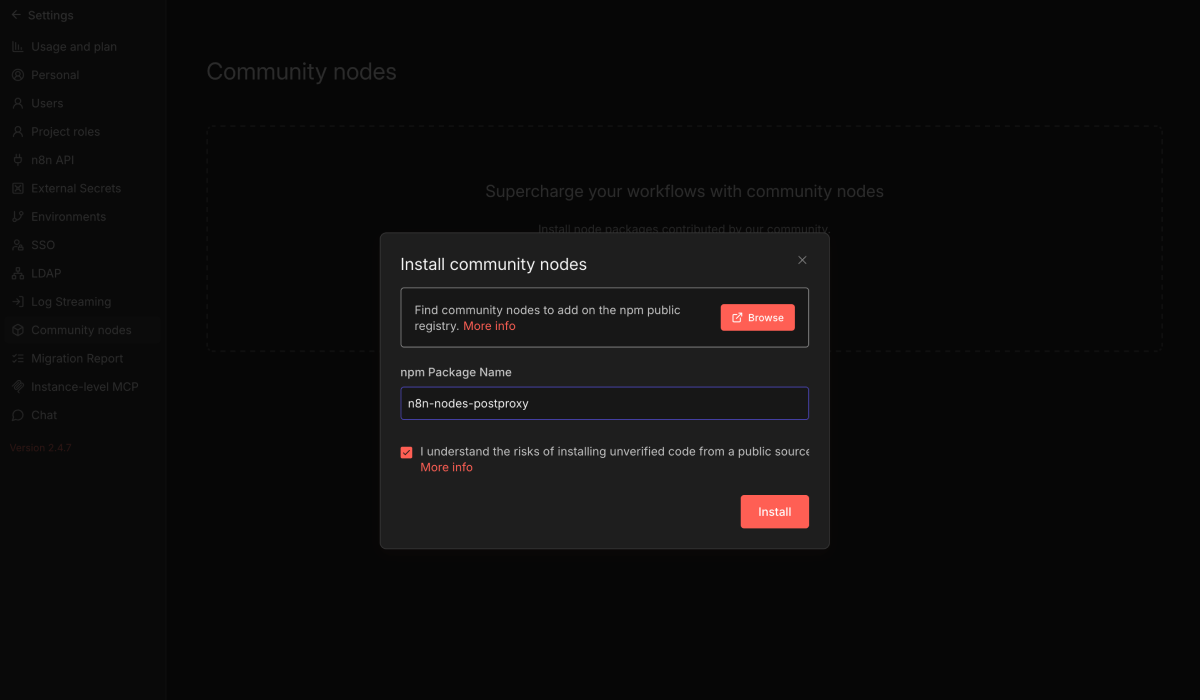
Install the Postproxy node in n8n
In n8n, open the community nodes section and install the Postproxy node. Once installed, create new credentials and paste your API key.
That’s it. No per-platform tokens. No refresh token juggling. No sacrificial debugging session.
Set up the content plan
The content source in this example is Airtable. Each row represents a publishing intent — a post title, a short description, maybe a topic or tone, and a status field. Not a platform-specific post. Just intent.
You can use any content source. Airtable happens to make the example easy to follow.
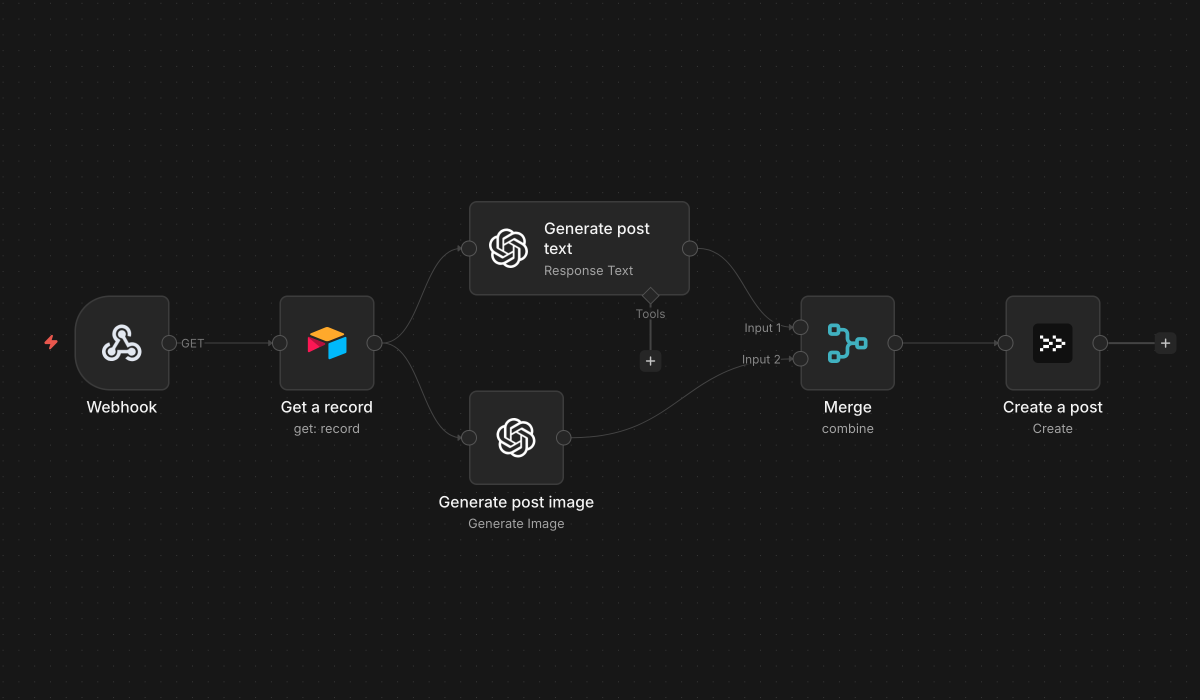
Build the workflow
The workflow has six steps:
Webhook trigger. This fires the whole thing. You can call it from Airtable automations, a cron job, another workflow, or a mysterious system nobody wants to maintain.
Fetch the record from Airtable. This gives us the raw input: what we want to say, not how to say it.
Generate post text with AI. This is optional. You can generate text elsewhere, write it yourself, or skip this step entirely. Postproxy doesn’t care where the text comes from.
Generate an image with AI. Same idea. Optional. Postproxy is not an AI content platform. It’s the last step before the internet judges you.
Merge text and image. This is the moment where the workflow becomes an actual post. Everything upstream is preparation. Everything downstream is consequences.
Publish with Postproxy. Pass the text, image, and target profiles. One request can target multiple platforms. Each platform is handled independently. Partial success is normal. Reality is messy.
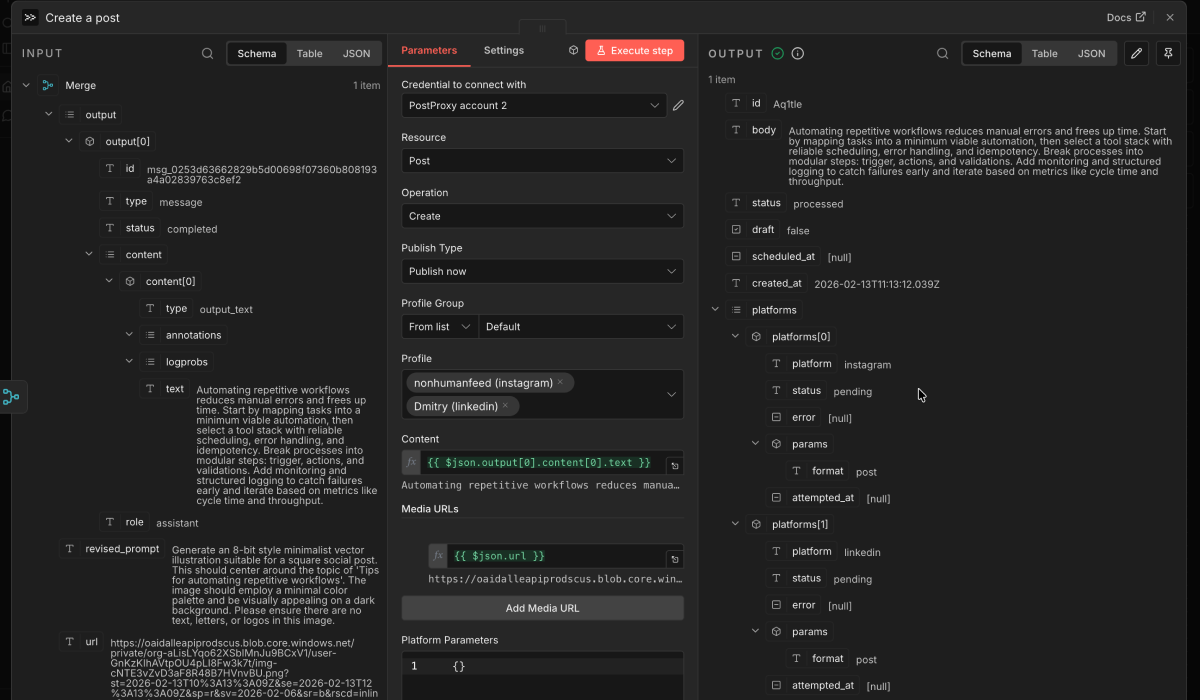
Here’s how the Postproxy node is configured in the workflow:
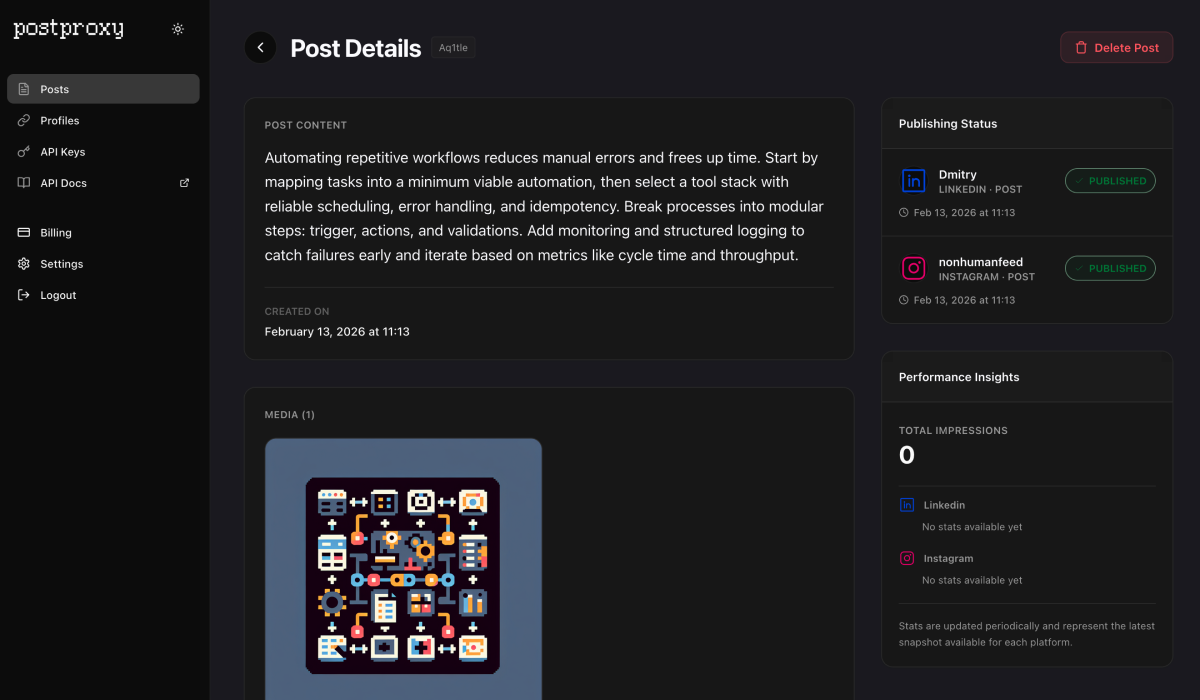
The result
The workflow runs. The post appears on every connected platform.
No manual uploads. No platform-specific branches. No “why does Twitter reject this but LinkedIn doesn’t” debugging spiral.
Why this matters
This tutorial is deliberately simple. The point is not the AI generation or the Airtable setup — those are interchangeable. The point is the publishing boundary.
Postproxy sits at that boundary. n8n orchestrates everything upstream. Generate content however you want. Schedule however you want. Publish through one stable API.
If something fails, you get a clear result per platform. If something works, you move on with your life.
Which is, frankly, the dream.
Postproxy
One API for every social platform
Publish to Instagram, X, LinkedIn, TikTok, YouTube and more with a single request. Free plan, no credit card required.