n8n
n8n-nodes-postproxy is the official PostProxy node for n8n — a verified community node, listed on the n8n integrations directory and maintained by Postproxy. One node publishes, schedules, and queues posts across every network Postproxy supports: Instagram, Facebook, TikTok, LinkedIn, X (Twitter), YouTube, Threads, Pinterest, Bluesky, Telegram, and Google Business. It also exposes supported comment, direct-message, queue, and webhook operations from the same workflow step — direct messages cover Facebook Messenger, Instagram, Telegram, and Bluesky.
It’s one of several ways to drive Postproxy — we built the whole toolkit so you can wire it into whatever you already run. Use the n8n node for visual workflows, the MCP server for AI agents, or the REST API and SDKs for code. These are different front doors into the same Postproxy account: the n8n node, REST API, SDKs, and API-key MCP setup all use the same API keys, so publishing from n8n behaves exactly like publishing from a script. (The one-click Claude and ChatGPT connectors sign in with OAuth instead.)
How to automate social media posting with n8n
Section titled “How to automate social media posting with n8n”The goal is a workflow that turns some trigger — a schedule, an RSS item, a form submission, an incoming comment — into a published or scheduled post, without you touching each network’s API. You add one PostProxy node, point it at your connected profiles, and n8n handles the rest of the graph around it.
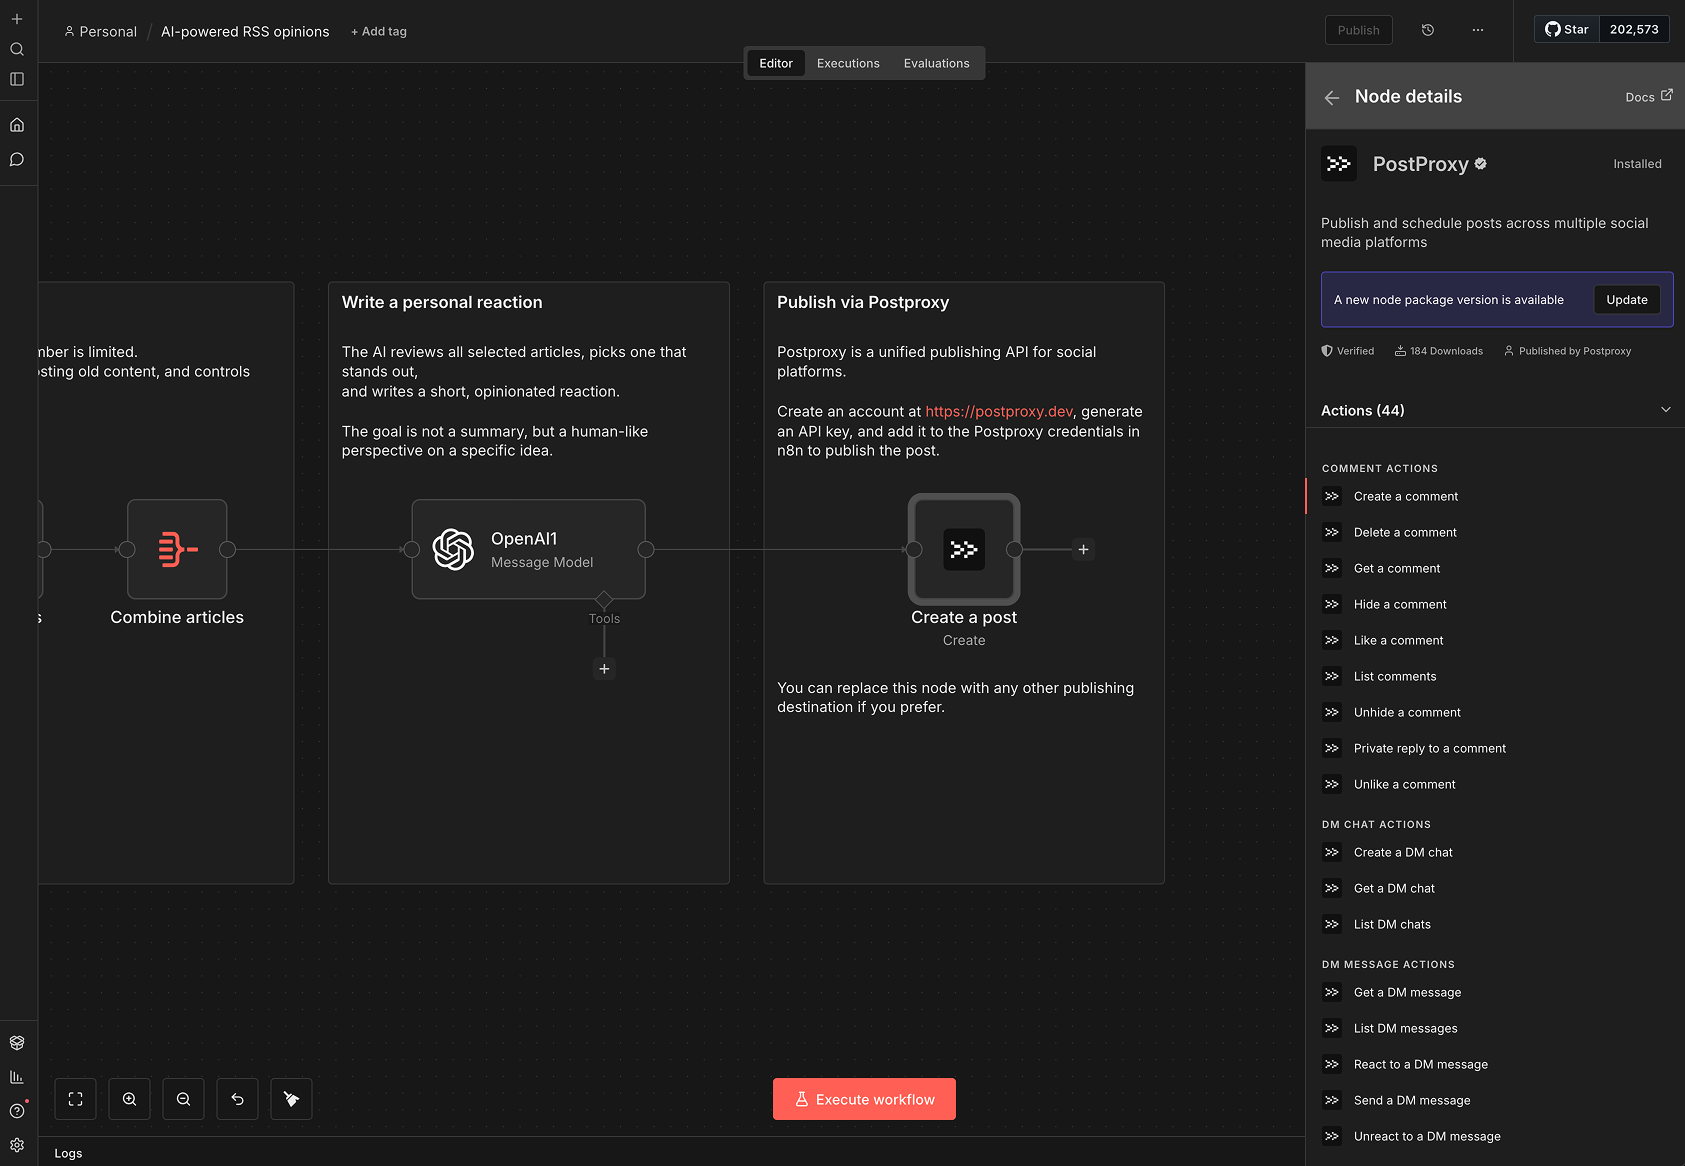
A minimal publishing pipeline is three nodes:
-
A trigger — Schedule, Webhook, RSS Feed Read, or a manual run while you build.
-
Optional transform nodes — Set, Code, or an AI node that writes the post copy.
-
A PostProxy node with Resource: Post and Operation: Create that publishes to your profiles.
The rest of this guide walks through installing the node, connecting credentials, publishing, scheduling, and the full set of operations the node exposes.
Install the PostProxy node
Section titled “Install the PostProxy node”The package name is n8n-nodes-postproxy. How you install it depends on where n8n runs.
Verified community nodes install directly from the workflow canvas — no npm step.
-
Open a workflow and open the nodes panel (the + on the canvas).
-
Search for PostProxy.
-
Select the verified PostProxy node to install it. A workspace owner or admin has to approve the install the first time; after that, everyone on the instance can use it.
-
Go to Settings → Community Nodes.
-
Select Install.
-
Enter the npm package name
n8n-nodes-postproxy. To pin a version, use[email protected]. -
Accept the community-node prompt, install, and restart n8n if your deployment requires it.
Install into your n8n user folder — useful for Docker or queue-mode deployments where the GUI installer isn’t available:
docker exec -it n8n shmkdir -p ~/.n8n/nodescd ~/.n8n/nodesnpm i n8n-nodes-postproxyRestart n8n afterward so it picks up the node. For air-gapped installs, point npm at your mirrored registry or a preloaded package tarball.
Connect PostProxy to n8n
Section titled “Connect PostProxy to n8n”The node authenticates with a single Postproxy API key, sent as a bearer token. You create the credential once and reuse it on every PostProxy node.
-
Get your API key. Sign in to your Postproxy dashboard, open Settings → API Keys, and create a key. Keys are either full-access or scoped to one profile group — see Authentication for the difference.
-
Create the credential in n8n. Add a PostProxy node, then under Credential to connect with choose Create New Credential. The credential type is PostProxy API; paste your key into the API Key field and save.
-
Test it. n8n verifies the credential the moment you save it, with
GET https://api.postproxy.dev/api/profile_groups/. A green check means the key is accepted and you’re ready to publish.
Publish your first post
Section titled “Publish your first post”Publishing lives on Resource: Post → Operation: Create. You pick a profile group, choose one or more profiles inside it, and write your content.
-
Add a PostProxy node and select Resource: Post, Operation: Create.
-
Leave Publish Type on Publish now.
-
Choose a Profile Group from the list.
-
Under Profiles, add one or more profiles. The list is filtered to the profile group you selected.
-
Write your Content. (It’s optional — you can leave it empty for media-only formats like stories.)
-
Optionally add Media URLs — public
http(s)links to images or video. -
Execute the node. Postproxy fans the post out to each selected network and returns the created post with its ID and per-platform status.
Behind the visual fields, the node sends Postproxy a request like this:
{ "post": { "body": "Hello from n8n and Postproxy" }, "profiles": ["profile-id-1", "profile-id-2"], "media": ["https://example.com/image.jpg"]}Placements and platform-specific options
Section titled “Placements and platform-specific options”Some networks post to a specific destination — a Facebook Page, a LinkedIn organization, a Pinterest board, or a Telegram channel. Expand Placements in the Post → Create node to pick these from a dropdown. For options the UI doesn’t expose (Instagram Reels format, YouTube titles, TikTok privacy, and the like), use the Platform Parameters field with a JSON object keyed by platform:
{ "instagram": { "format": "reel", "first_comment": "Link in bio!" }, "youtube": { "title": "Product launch", "privacy_status": "public" }}See the Platform Parameters reference for every supported key.
Google Business locations aren’t exposed as a placement dropdown in this node version. Run Profile → List Placements to find the location, then pass it through Platform Parameters:
{ "google_business": { "format": "standard", "location_id": "accounts/123456789/locations/987654321" }}Schedule posts across platforms
Section titled “Schedule posts across platforms”The same Post → Create operation schedules instead of publishing — you change Publish Type. There are three ways to publish later:
- Schedule — set Publish Type: Schedule and a Publish At timestamp (ISO 8601). Postproxy holds the post and releases it at that time, across every selected network.
- Draft — set Publish Type: Draft to stage a post without sending it. Publish it later with Post → Publish, or from the dashboard.
- Queue — set Publish Type: Queue, pick a Queue, and optionally a Queue Priority (
high,medium,low). The queue assigns the next open timeslot automatically, so you don’t pick a time. Manage recurring weekly slots with the Queue resource (see Queues).
What the node can do
Section titled “What the node can do”One node covers the main Postproxy publishing and engagement workflows. Each Resource groups related Operations:
| Resource | Operations | Reference |
|---|---|---|
| Post | Create, Publish, Update, Delete, Get Post Details, Get Stats, List Posts | Posts |
| Profile | List Profiles, Get Profile Details, List Placements, Delete | Profiles |
| Profile Group | Create, Get, List Profile Groups, Delete | Profile Groups |
| Queue | Create, Update, Get, List, Get Next Slot, Delete | Queues |
| Comment | Create, List, Get, Hide, Unhide, Like, Unlike, Private Reply, Delete | Comments |
| DM Chat | Create, Get, List | Direct Messages |
| DM Message | Send, List, Get, React, Unreact | Direct Messages |
| Webhook | Create, Update, Get, List, List Deliveries, Delete | Webhooks |
A few things worth knowing when you build with them:
- Profiles are a two-step pick. Select a Profile Group first, then choose one or more Profiles inside it. IDs are case-sensitive alphanumeric strings, and one post can target several profiles at once.
- Most list operations paginate. Post, Profile, Profile Group, Comment, DM Chat, DM Message, and Webhook Deliveries can page through results or Return All; Queue List and Webhook List simply return their full list.
- Comments and DMs are ID-driven. Comments need a Post ID plus the Profile ID that should act on the platform. DM Chat list/create starts from a Profile ID; once you have a chat or message, DM Message operations use a Chat ID or Message ID.
- Continue On Fail is respected. With it enabled, a failing input item returns an
erroron that item instead of stopping the whole execution — handy when you loop over many posts.
Example workflows
Section titled “Example workflows”Auto-reply to comments and DMs with AI approval
Section titled “Auto-reply to comments and DMs with AI approval”The node ships with an ai-reply-bot example that turns incoming engagement into drafted replies you approve from Telegram before anything is posted:
-
A Webhook trigger receives Postproxy events at a path like
postproxy-events. -
An IF node checks the event type. On
comment.created, Comment → List pulls the thread; onmessage.received, DM Message → List pulls the conversation. -
A Code node formats the thread with an editable
KNOWLEDGE_BASE, and an OpenAI node drafts a reply (or returnsNO_REPLY). -
A Telegram node sends you the draft for approval; a Wait node pauses until you approve.
-
On approval, Comment → Create posts the reply (threaded via the parent comment) or DM Message → Send sends the message.
To wire it up, create a Postproxy webhook pointing at your n8n webhook URL (<your-n8n-url>/webhook/postproxy-events) and subscribe to comment.created and message.received.
Publish AI opinions from an RSS feed
Section titled “Publish AI opinions from an RSS feed”A second example reads RSS feeds, has an AI node pick one article and write a short reaction, then publishes it:
-
A Schedule or manual trigger kicks things off.
-
RSS Feed Read fetches items; Filter and Limit nodes keep only recent ones.
-
An OpenAI node selects an article and writes the post copy.
-
A PostProxy node (Post → Create) publishes the result.
Choose your setup: n8n, MCP, API, or SDK
Section titled “Choose your setup: n8n, MCP, API, or SDK”The n8n node is one entry point to Postproxy. They all reach the same Postproxy API, so pick whichever fits the surface you’re automating — or mix them.
| You want to… | Use | Docs |
|---|---|---|
| Build visual, no-code workflows | n8n node | this page |
| Let an AI agent publish and manage posts | MCP server | MCP Server |
| Call Postproxy from your own backend | REST API | API Reference |
| Use idiomatic methods in your language | SDKs (7 languages) | SDKs |
Postproxy carries the platform differences — placements, rate limits, retries, media handling — behind that one API, so your n8n graph (or your code) stays about your logic, not each network’s quirks.
Troubleshooting
Section titled “Troubleshooting”Credential test fails / 401 Unauthorized. The API key is missing or wrong. Recreate the PostProxy API credential and paste a fresh key from Settings → API Keys in the dashboard.
“At least one profile must be selected.” Post → Create needs a Profile Group and at least one Profile chosen inside it. If the profile list is empty, confirm the account is connected in the dashboard and that your API key can reach that profile group.
404 on a post, comment, or DM operation. The ID doesn’t exist or isn’t visible to your key’s scope. Use the matching List operation (List Posts, List Profiles) to fetch valid IDs first.
429 / rate limited. Once a post is accepted, Postproxy handles downstream platform rate limits for you. If the Postproxy API itself returns 429, slow the workflow down — add a delay, or push posts through a queue.
The node times out. Requests time out after 30 seconds. Check your network egress, and confirm whether the post was created before retrying so you don’t duplicate it.
Media rejected. Media URLs must start with http:// or https:// and point at a publicly reachable file. Invalid entries are dropped; if every URL is invalid the node errors.